So, I decided to build a kegerator after I saw how easy it was to
keg beer. Thus began the long journey of an OCD Chemist who likes to
research things before he jumps into construction. I spent about 3
weeks researching parts, designs, etc. about the kegerator. After all
the parts came in, it took about 3-1/2 days to complete the construction
(with the help of my wife Anne and son Julian of course). It came together very
nicely, and once I add some bells and whistles, I think it will be
perfect!
I am including a bunch of pictures as sort of a photo
journal for those who want to see how the kegerator was made, and for
those who may want to make one on their own. If you have any questions
(on construction issues or where I got some of the parts) feel free to
post them in the blog and I'll get back with you as soon as I can.
Enjoy!
Parts List
- Danby DAR440BL Refrigerator
- Stainless Dual Tap Draft Tower with Two Perlick 575SS Stainless Creamer Faucets
- Surface Mount Drip Tray for 3" Column Cut-Out
- CO2 Beer Regulator, Dual Body, Three Gauge, Taprite Brand (1/4" Barb)
- 5 lb. CO2 Cylinder
- Gas Line Assembly 5/16" – Pin Lock
- Disconnect Out (Liquid), Barbed End
- Aluminum Foil Tape
- White Silicone Caulk
- 1-1/4" Fiberglass Reinforced Cut-off Wheels – Dremel
- Milwaukee 2–1/2" Bi–Metal Hole Saw
- Milwaukee Pilot Drill Bit
- Hardwood Flooring for Tower Mount
- Gas Line Mount (from inside fridge to CO2 tank)
- 5/16" Barb to 1/4" MIP
- 1/4" FIP Coupler
- 1/2" Steel Washer
- Rubber Washers – Handmade from Rubber Gasket Sheet
- 1/4" Pipe Nipple (3" Long)
- Rubber Hose Washer
- 1/4" Female to Female Elbow
- 1/4" Pipe Nipple (4" Long)
- 1/4" FIP Coupler
- 5/16" Barb to 1/4" MIP
 |
| 01_New Danby DAR440BL Fridge |
 |
| 02_Shelves Removed |
 |
| 03_Door Removed |
 |
| 04_Seal Removed From Door |
 |
| 05_Shelving Grooves Inside Fridge |
 |
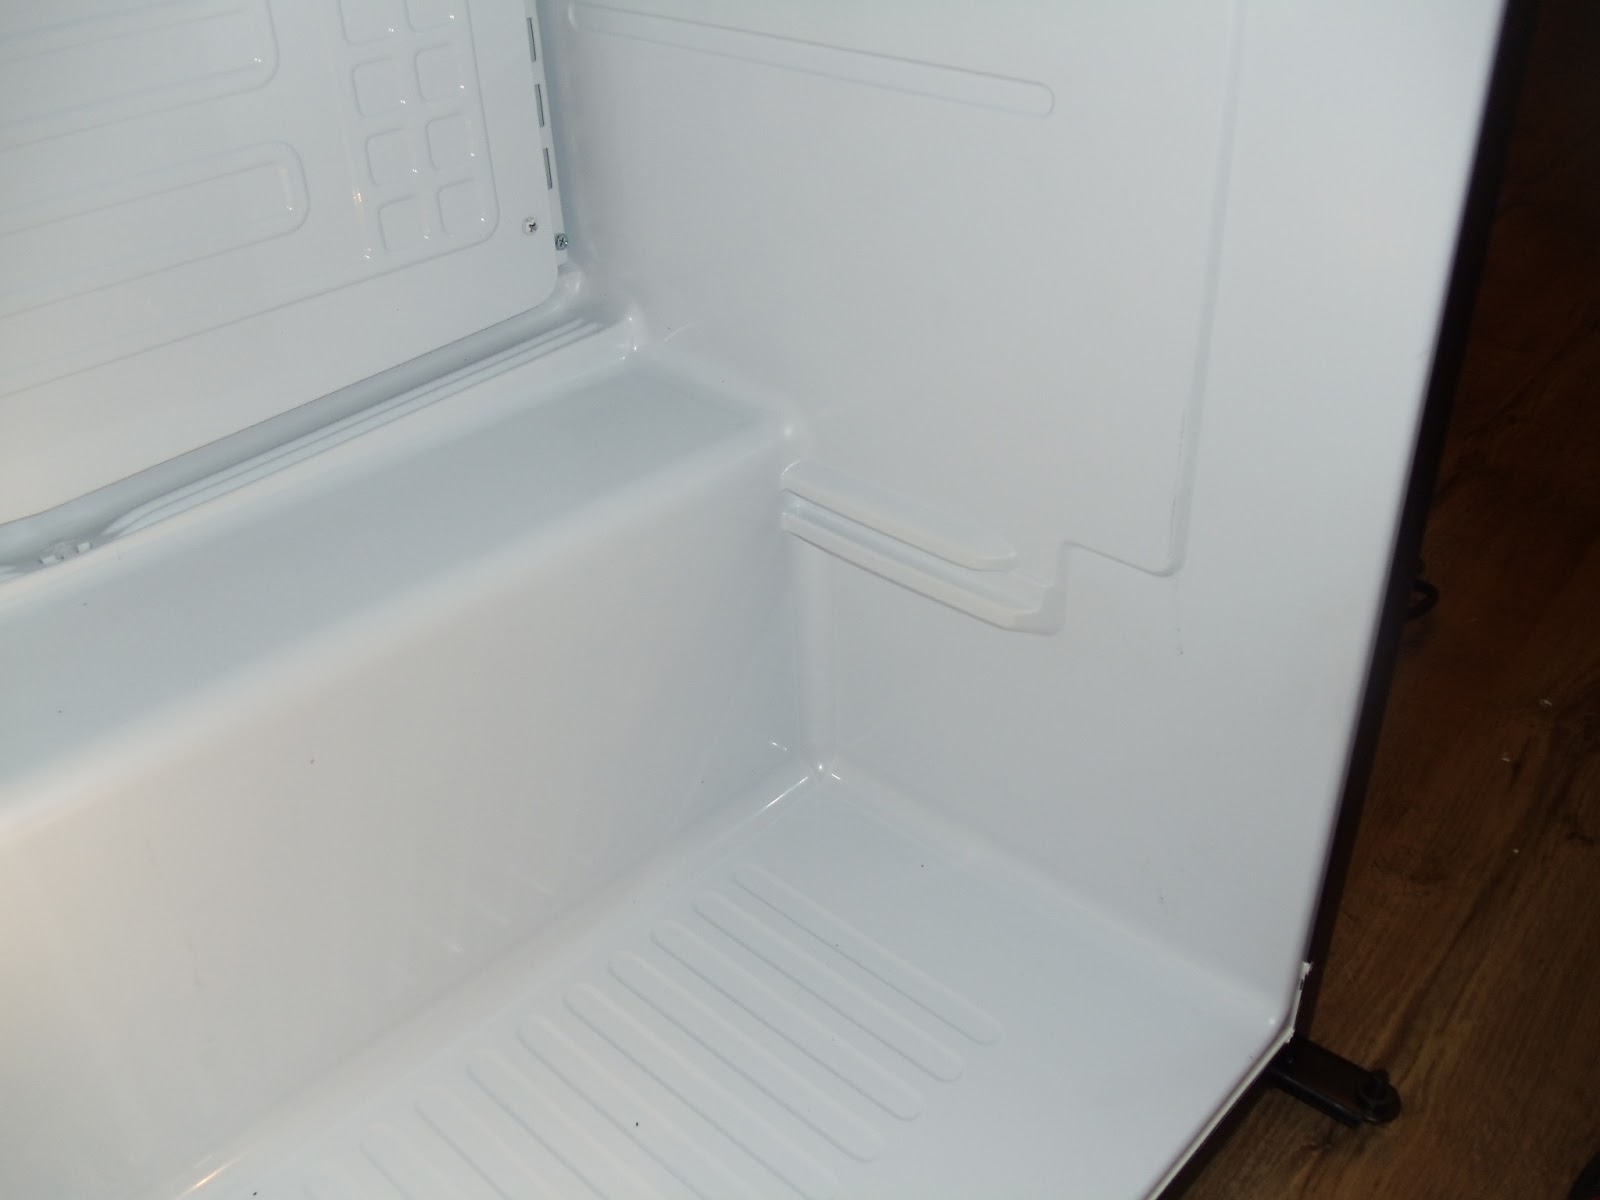
| 06_Groove Removed to Fit 2 Kegs |
 |
| 07_Starting to Remove Shelve Units on Door |
 |
| 08_More Removal |
 |
| 09_Removal of All but Top Corner |
 |
| 10_Door Shelves All Removed |
 |
| 11_Door Unit Sanded Down |
 |
| 12_Covering Insulation with Aluminum Foil Tape |
 |
| 13_Break Time with a Refreshing Beer |
 |
| 14_Door Unit Done (I left the top corner intact so the light inside the fridge can still turn off and on.) |
 |
| 15_Gas Hoses & Beer Couplers |
 |
| 16_Drilled Holes on Bulk Head for Gas Lines |
 |
| 17_Anne Filing Down Metal with Dremel |
 |
| 18_Pipe Fittings at Back of Fridge |
 |
| 19_Starting to Make Homemade Rubber Washers |
 |
| 20_Homemade Washers Complete |
 |
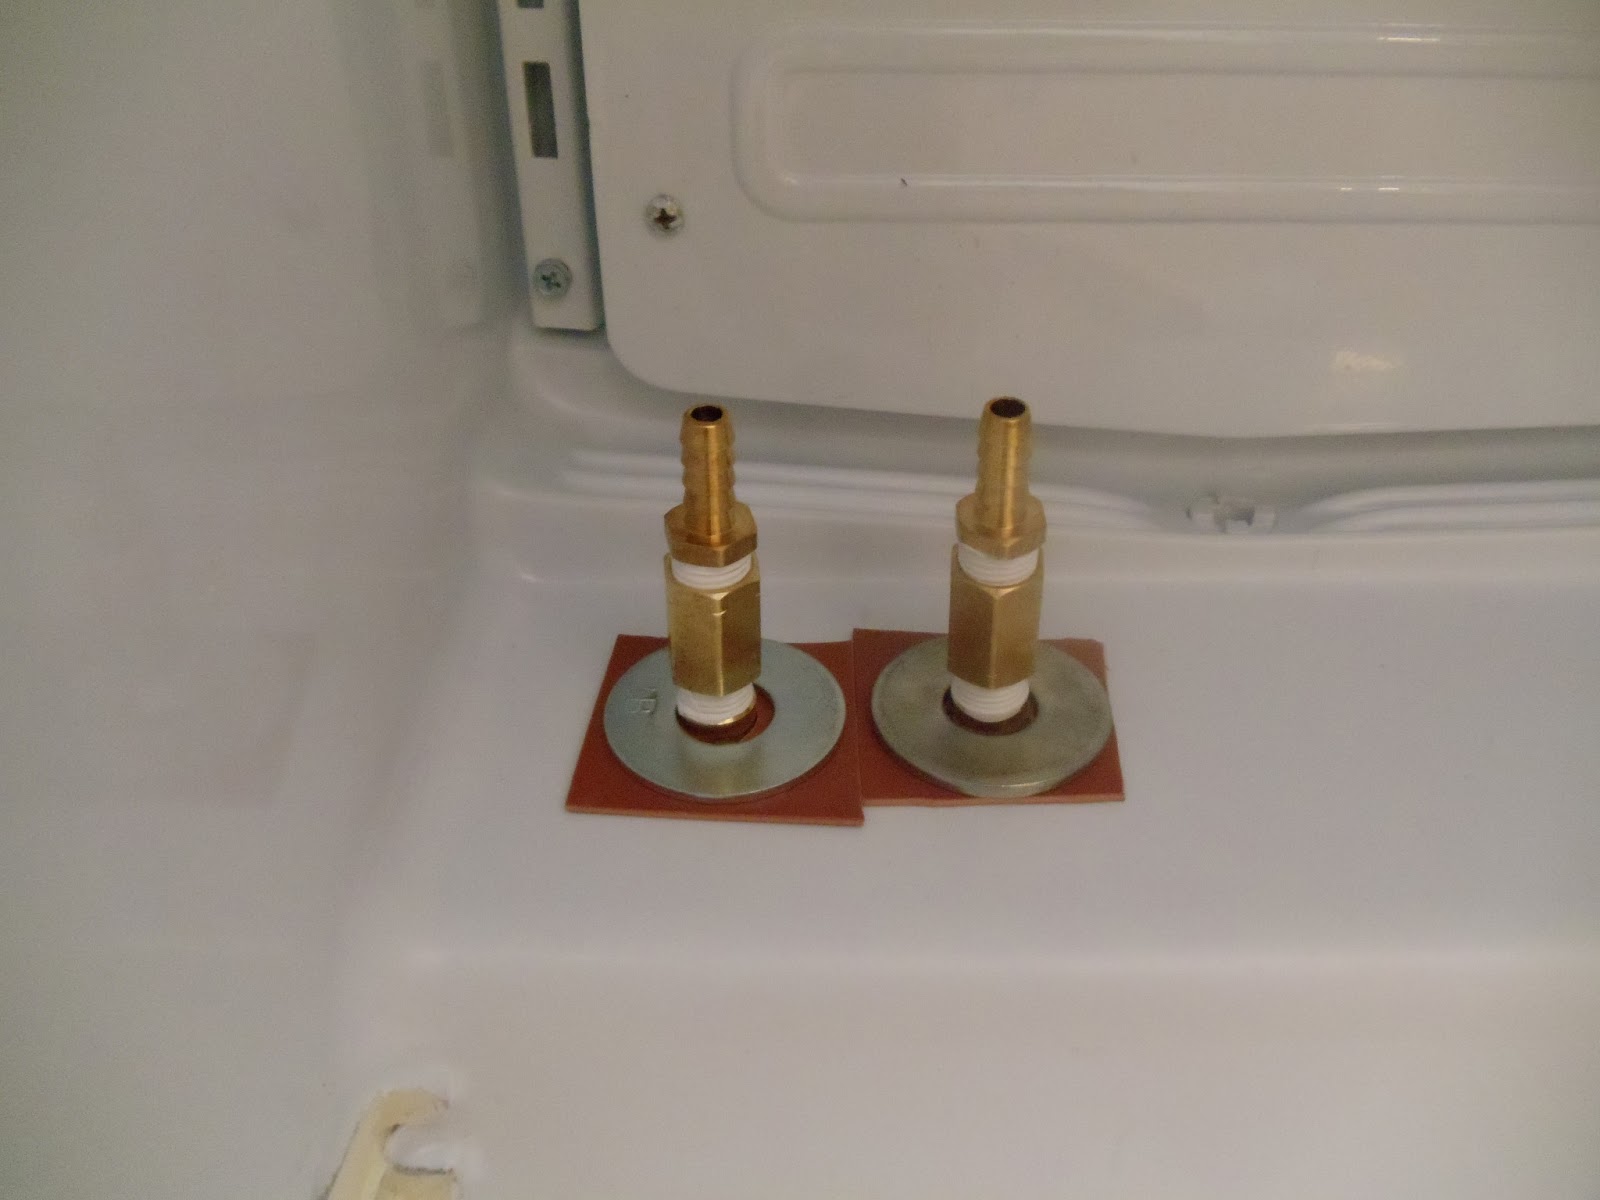
| 21_Rubber Washers, Steel Washers, and Metal Pipe for Gas Lines |
 |
| 22_Complete Gas Hardware Inside Fridge |
 |
| 23_Gas Hardware |
 |
| 24_Anne Connecting Gas Lines to Fridge |
 |
| 25_Gas Lines Connected |
 |
| 26_Completed Gas Lines |
 |
| 27_Top of Fridge with Light Box & Back Marked Out |
 |
| 28_X Marks the Spot for Tower |
 |
| 29_Starting to Drill Hole |
 |
| 30_Hole Begun |
 |
| 31_Metal Top Removed |
 |
| 32_All the Way Through |
 |
| 33_Hole for the Tower |
 |
| 34_Completed Hole for the Beer Tower |
 |
| 35_Silicone Caulk to Waterproof the Hole |
 |
| 36_Completed Caulking |
 |
| 37_Aluminum Foil Tape on Inside Fridge |
 |
| 38_After Caulk Dried Overnight |
 |
| 39_Aluminum Foil Tape for Hole |
 |
| 40_Aluminum Foil Tape Inside Fridge |
 |
| 41_Beer Tower Placed |
 |
| 42_Mapping out Light Box from Inside Fridge |
 |
| 43_Tracing of Light Box onto Wood Flooring |
 |
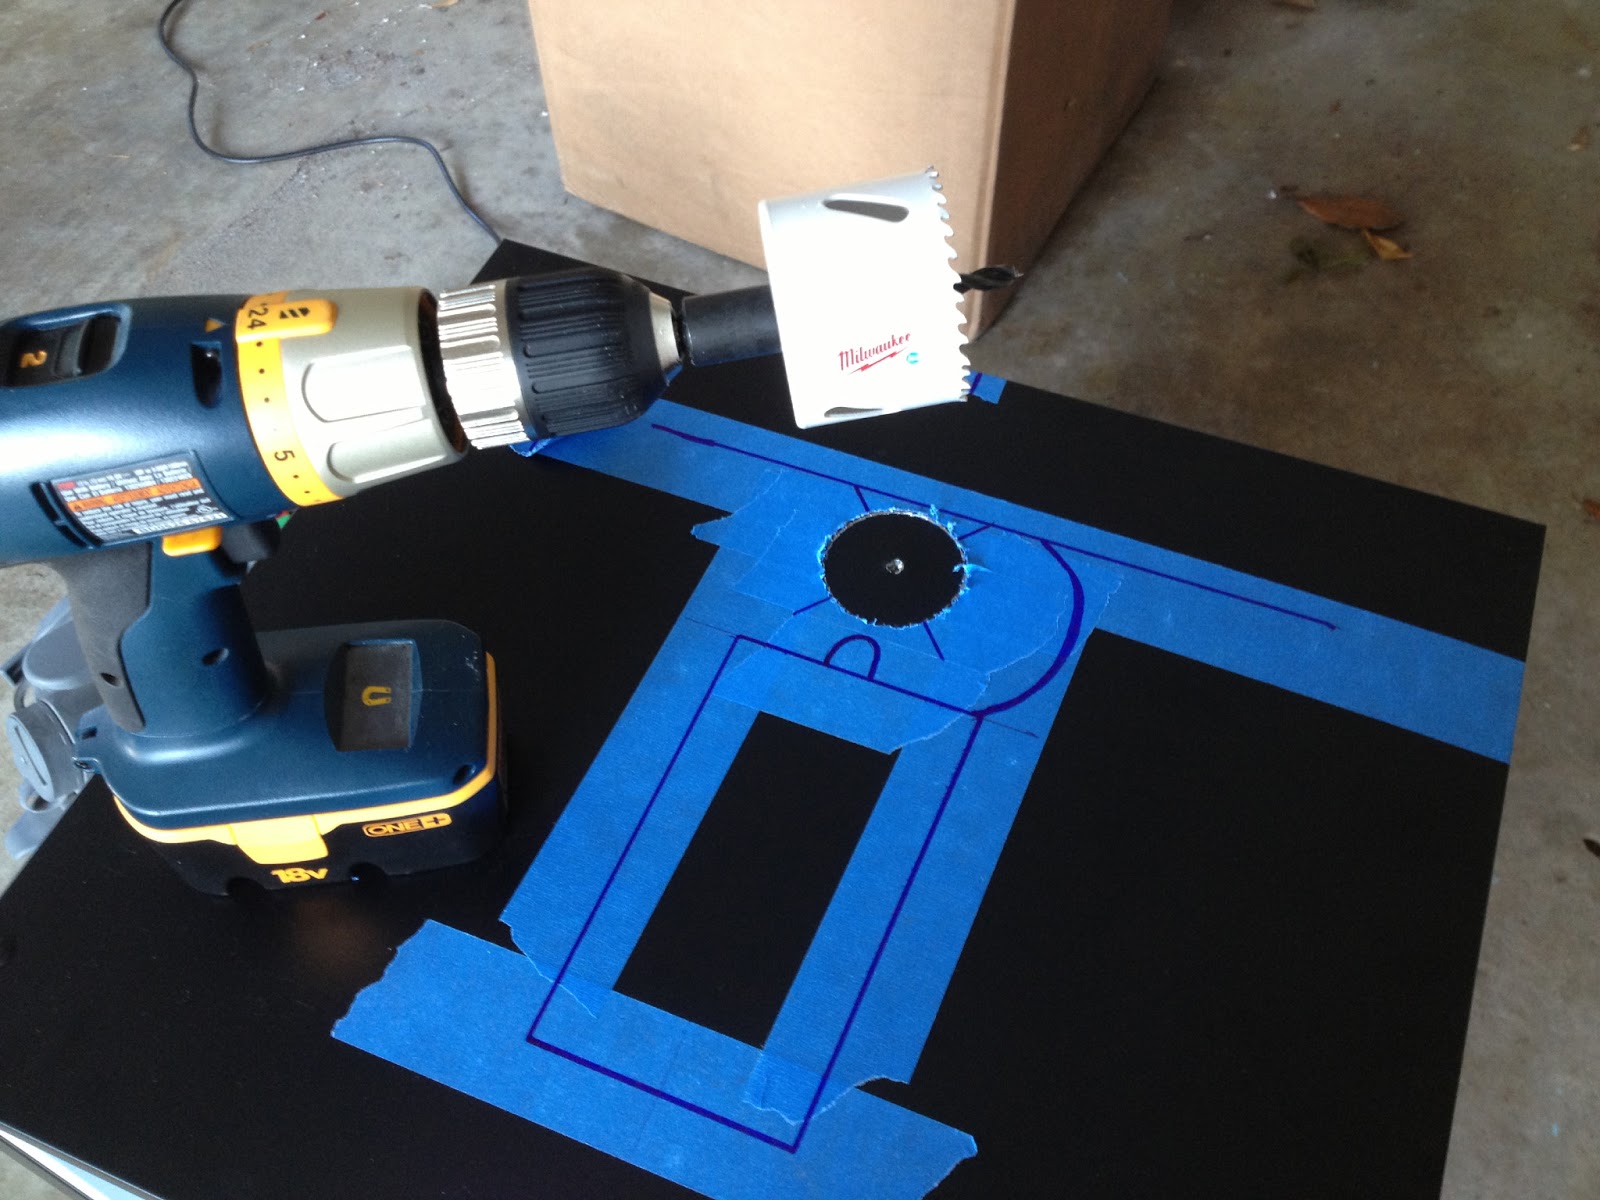
| 44_Julian Helping Saw Mounting Hardware for Tower |
 |
| 45_Bottom of Mounting Hardware |
 |
| 46_Hole Marks for Drilling Hole |
 |
| 47_Getting Ready to Drill Hole for Mounting Hardware |
 |
| 48_Hole Complete in Mounting Hardware |
 |
| 49_Lining Up Tower for Bolt Holes |
 |
| 50_Holes Complete |
 |
| 51_Holes for the Bolts to Connect Tower |
 |
| 52_Tower Placed & Ready to Mount |
 |
| 53_Inside the Fridge Showing Tower Mounted |
 |
| 54_Mount Reinforced with Aluminum Foil Tape |
 |
| 55_Tower with Taps |
 |
| 56_Anne's Completed Tubing for CO2 Tank |
 |
| 57_1st Beer Poured from New Kegerator |
 |
| 58_Adjusting the CO2 Pressure |
 |
| 59_2nd Pour |
 |
| 60_Completed Kegerator |
 |
| 61_Homemade Kegerator with Imperial White Ale on Tap |